How to Create Home Improvement Videos That Showcase Your DIY Projects
Finishing a weekend renovation feels incredible, but capturing that transformation on camera often proves more frustrating than the project itself. Shaky footage, inconsistent lighting, and hours spent learning unfamiliar editing software can make an impressive project look far less polished than it deserves. The good news is that creating engaging home improvement videos no longer requires professional equipment or years of editing experience. With a little planning, a clear storytelling approach, and the right editing workflow, you can turn everyday renovation projects into videos that educate, inspire, and keep viewers watching until the final reveal.
August 07, 2026 13:59
How to Create Home Improvement Videos in 5 Simple Steps
Creating compelling home renovation videos isn't about having expensive cameras or a professional film crew. It's about documenting your project in a way that tells a clear story, captures meaningful progress, and keeps viewers engaged from the first clip to the final reveal.
The following workflow covers every stage of the process, from planning your shots before demolition begins to preparing your finished video for YouTube, TikTok, Instagram, and other platforms. By following these steps, you'll create videos that not only showcase your craftsmanship but also provide genuine value for your audience.
Step 1: Plan Your Shots Before You Pick Up a Tool
The biggest mistake DIY video creators make is treating filming as an afterthought. Once demolition begins or fresh paint goes on the wall, it's impossible to go back and capture the moments that tell the story of the transformation.
Map the Narrative Arc
Every compelling home improvement video follows a simple structure: show the problem, document the process, and reveal the finished result. Before you start working, identify the key milestones you want to capture, such as removing old fixtures, installing new materials, solving unexpected challenges, and completing the final reveal.
Keeping a simple shot list on your phone or notepad helps ensure you don't miss important moments once the project is underway.
If you're filming over multiple days, keep your camera position as consistent as possible when recording progress updates. Matching angles makes before-and-after comparisons more impactful and gives viewers a clearer sense of how the project evolved.
Gather Your Visual Assets
Take wide-angle photos of the room before you begin and capture close-up shots of outdated features, damaged surfaces, or areas you'll be improving. As the project progresses, continue documenting major milestones with both photos and short video clips.
These visuals don't just provide useful context for viewers. They also make it easier to create thumbnails, social media posts, project portfolios, and before-and-after comparisons once the renovation is complete.
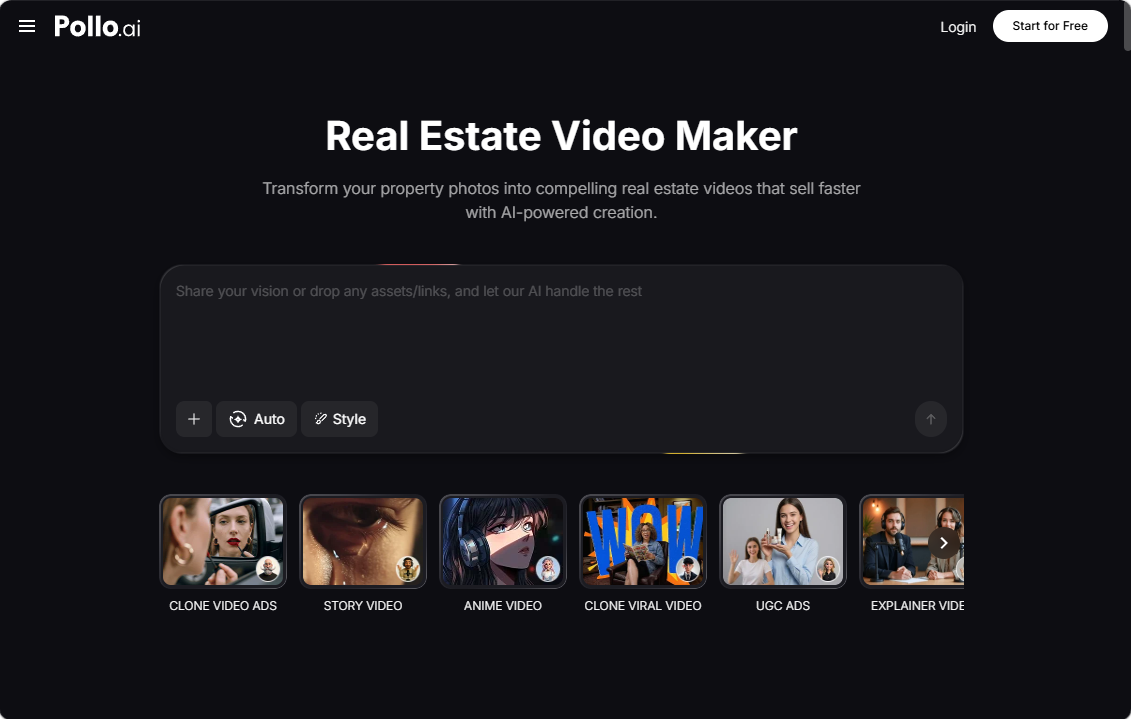
The Real Estate Video Maker available through Pollo AI, for example, can take a set of finished-room photographs and produce a narrated walkthrough video that highlights architectural details and design choices, saving you from scripting and manually recording the voiceover.
Step 2: Capture Footage That Tells a Story
Professional cameras are helpful, but they aren't essential. A modern smartphone paired with an inexpensive tripod can produce excellent results. What matters most is capturing a variety of shots that clearly show how the project evolves from start to finish.
Shoot in Sequences
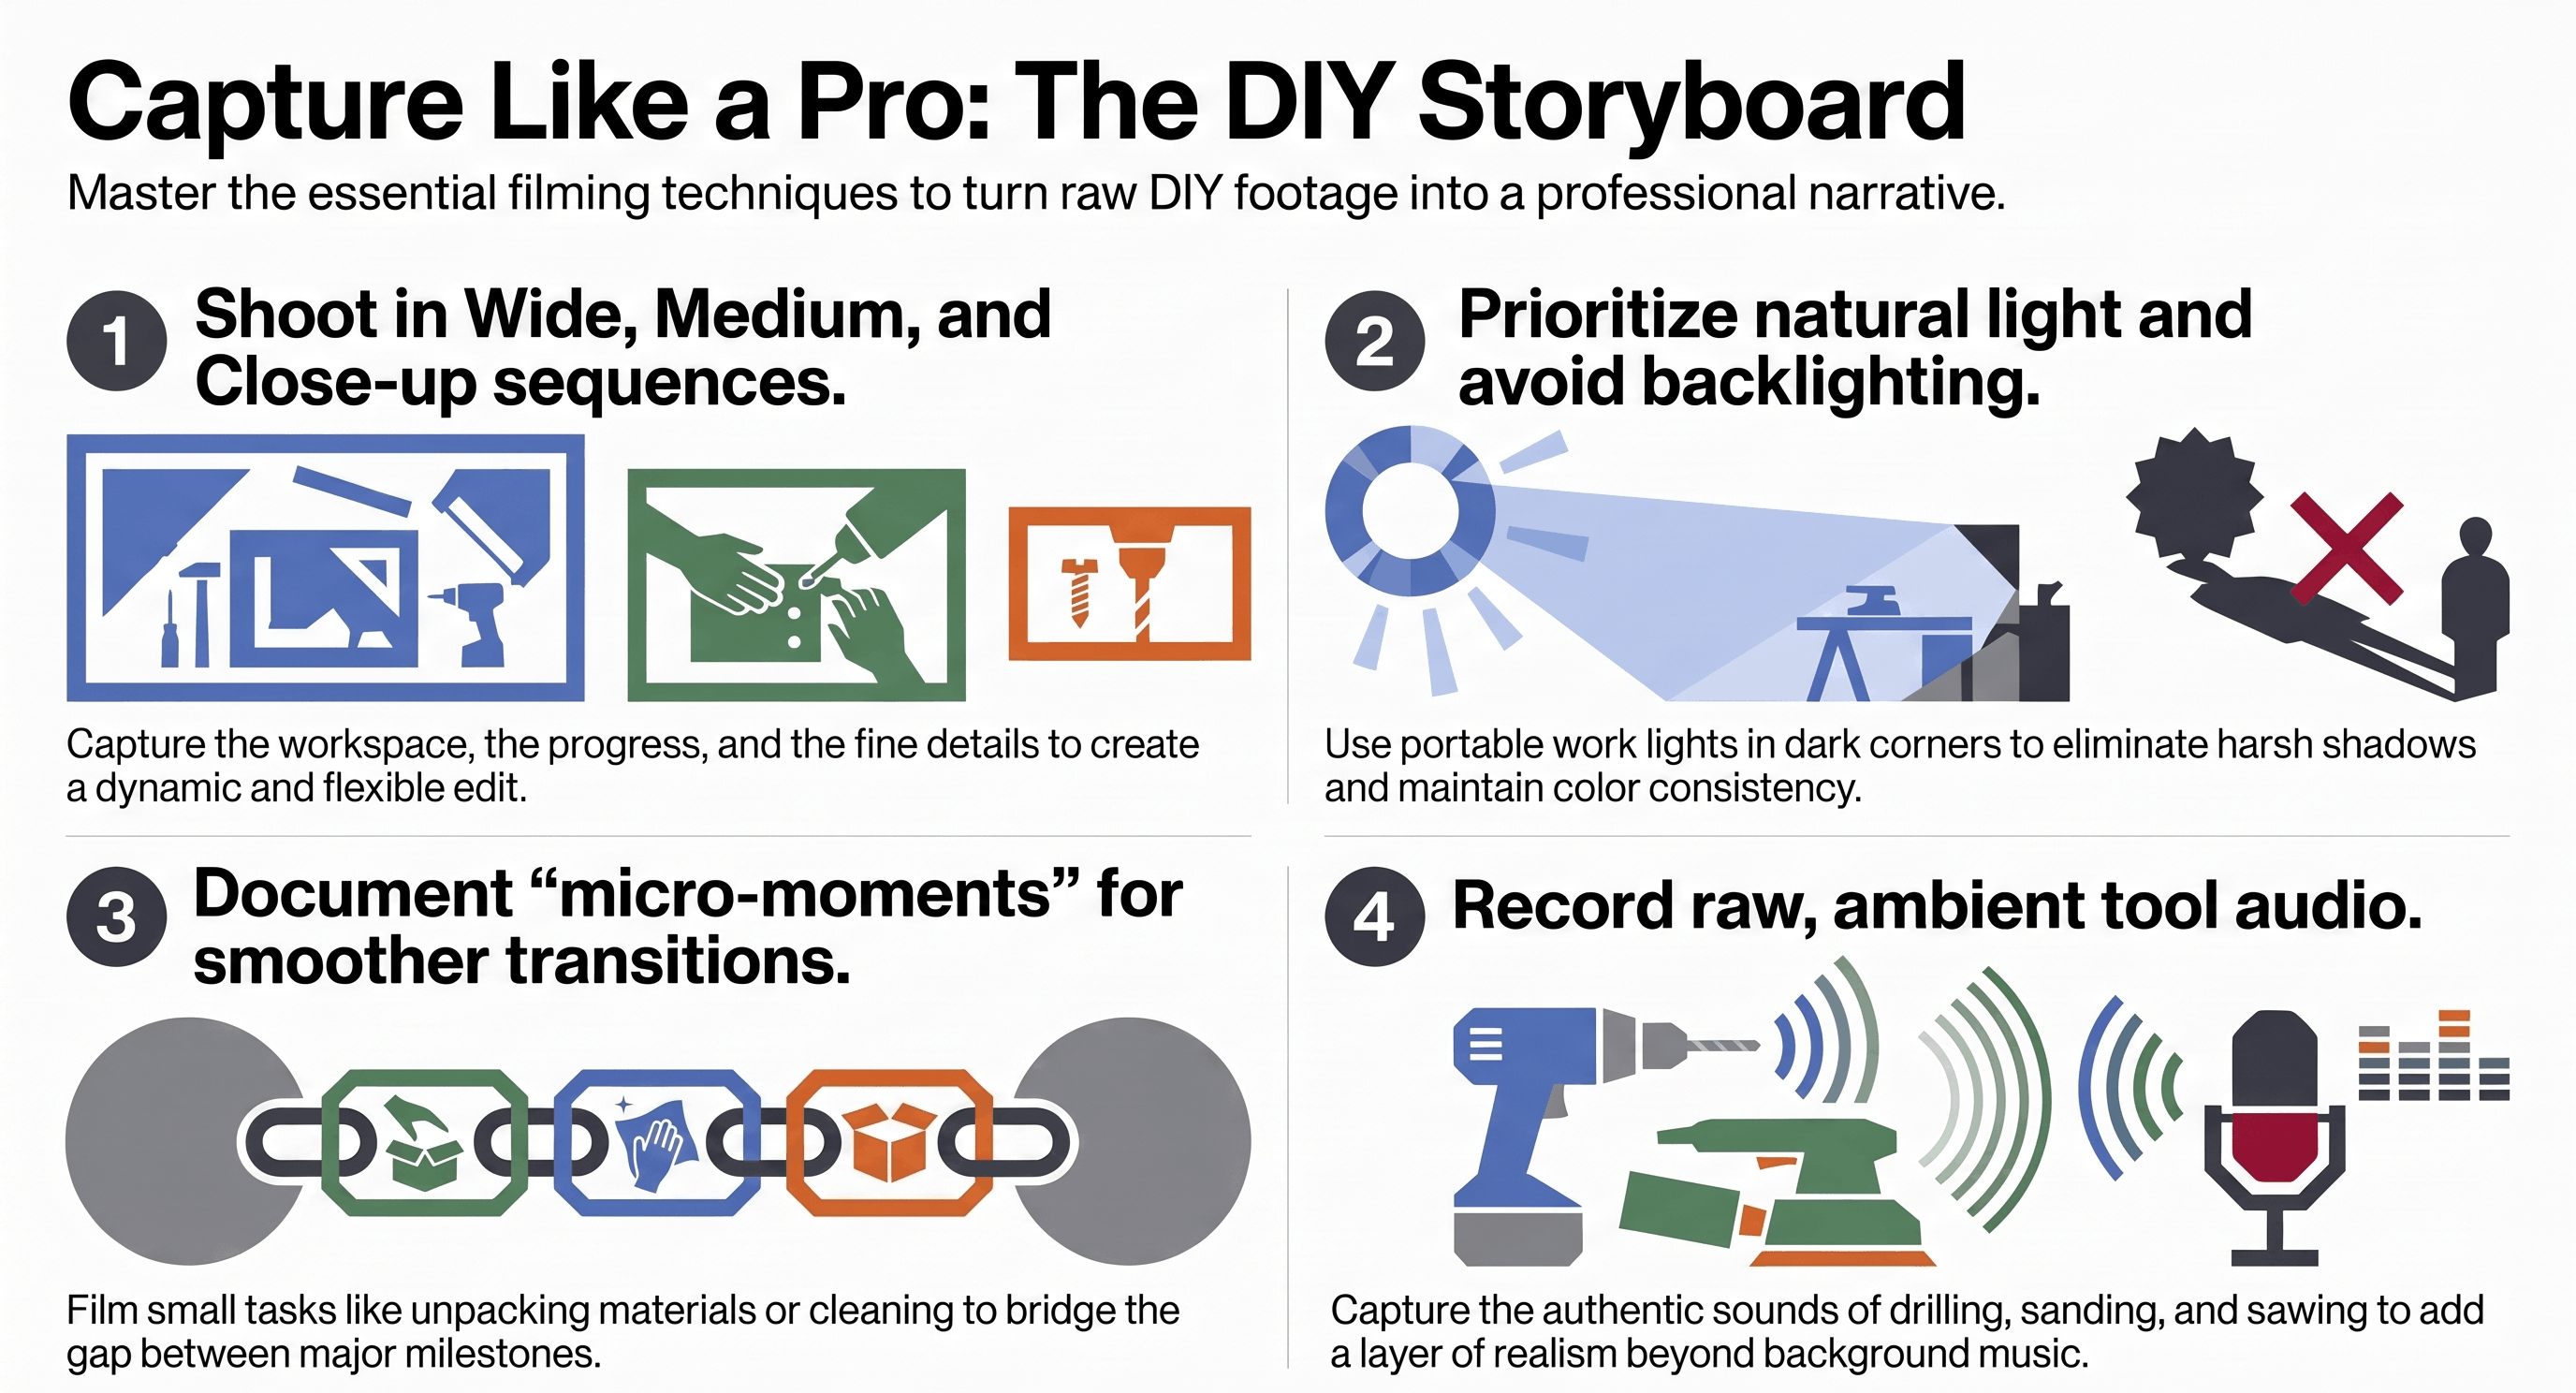
Instead of recording long, continuous clips, capture short sequences for every major task. Start with a wide shot to establish the workspace, switch to a medium shot of the work in progress, and finish with close-ups that highlight important details. This approach creates a more engaging viewing experience while giving you greater flexibility during editing.
Use Lighting to Your Advantage
Whenever possible, film during the day and take advantage of natural light. If you're working indoors or in darker spaces, add portable work lights to reduce harsh shadows and keep colors looking consistent throughout the project.
Try to avoid filming directly into bright windows, as strong backlighting can make both you and your work appear underexposed.
Capture More Than the Main Task
The small details often make a renovation video feel more complete. Record clips of measuring, unpacking materials, organizing tools, applying finishes, or cleaning up the workspace. These supporting shots help smooth transitions between major scenes and make the final edit feel more polished.
Record Ambient Audio
Natural sounds such as sanding wood, drilling screws, rolling paint, or laying tile add authenticity that background music alone cannot provide. Even if you plan to include music or narration later, recording clean ambient audio gives you more creative options during editing.
Step 3: Assemble and Polish Your Edit
Editing is where your footage becomes a story. Rather than trying to include every clip you recorded, focus on showing meaningful progress while keeping the video moving at a steady pace.
Begin by arranging your clips in chronological order. Trim repetitive moments, remove unnecessary pauses, and let each scene naturally lead into the next. If part of the project takes several hours but doesn't add much visual interest, speed it up with a time-lapse instead of showing it in real time.
Place your strongest before-and-after comparison near the end of the video. The finished reveal is often the moment viewers are waiting for, so allowing the transformation to build naturally creates a more satisfying viewing experience.
If you're looking to speed up post-production, AI-powered video editing tools can also help automate repetitive tasks such as generating captions, creating voiceovers, producing background music, or extending slightly too-short clips. Used thoughtfully, these features can reduce editing time while allowing you to focus on telling a clear, engaging story.
Step 4: Use AI to Fill Workflow Gaps
Even with careful planning, you'll occasionally end up with footage that's shorter than expected or discover small gaps while editing. Rather than reshooting an entire sequence, AI-powered editing software can help solve these problems quickly.
For example, some AI video tools like Runway, Kling AI, Invideo AI, CapCut, etc. allow you to extend short clips, generate natural-sounding voiceovers, create background music, or produce captions automatically. These features can be especially useful when you're working alone and don't have time to manually recreate missing footage.
Also, AI Video Extender from Pollo AI solves this exact problem. Upload your short clip, add a text prompt describing how the scene should continue, and the tool intelligently generates additional frames that match the original footage in color, motion, and composition.
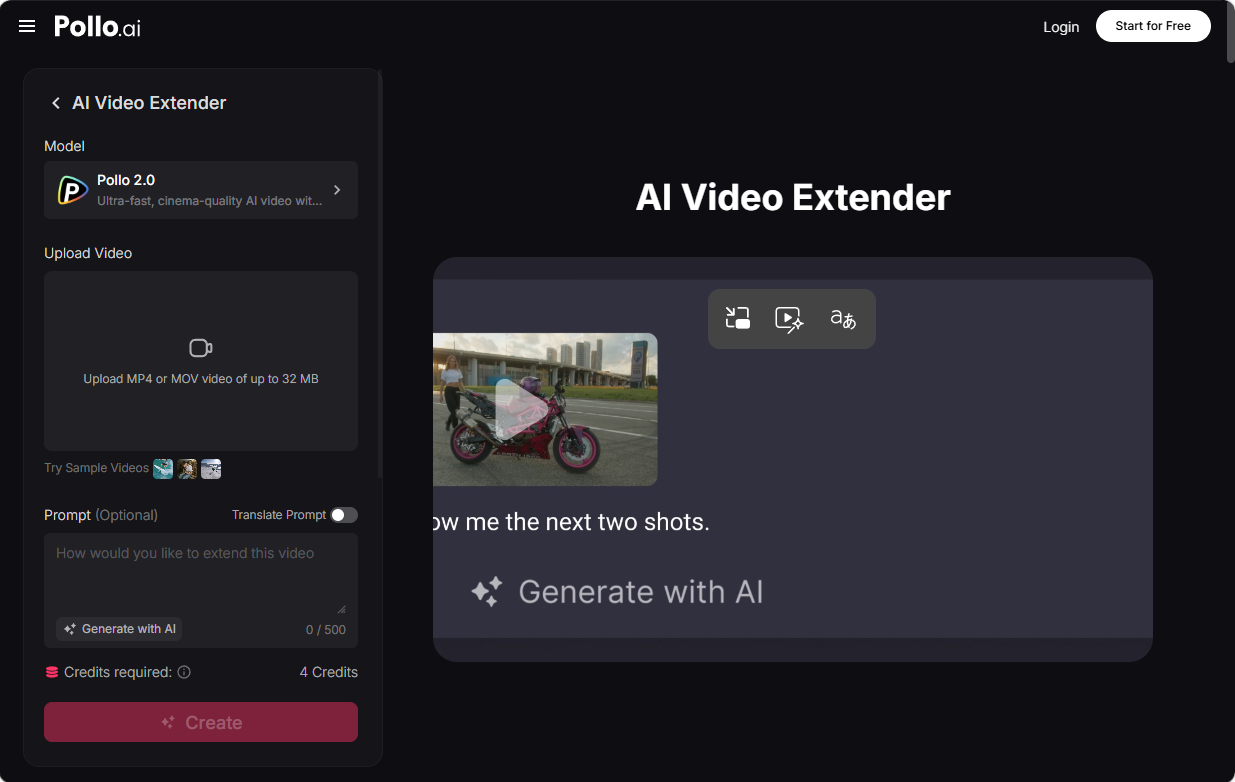
You can stretch a clip by one to seven seconds, choosing between a fast generation mode for quick drafts or a professional mode that prioritizes visual fidelity. Output resolutions span 540p, 720p, and 1080p, so the extended segment integrates seamlessly regardless of your project's final export settings.
The goal isn't to replace your original project footage. Instead, AI works best as a time-saving assistant that helps you finish your video more efficiently while keeping the focus on the renovation itself.
Step 5: Optimize and Distribute Across Channels
Creating one great video is only part of the process. To reach a wider audience, adapt your content for the platforms where your viewers spend the most time.
Choose the Right Format
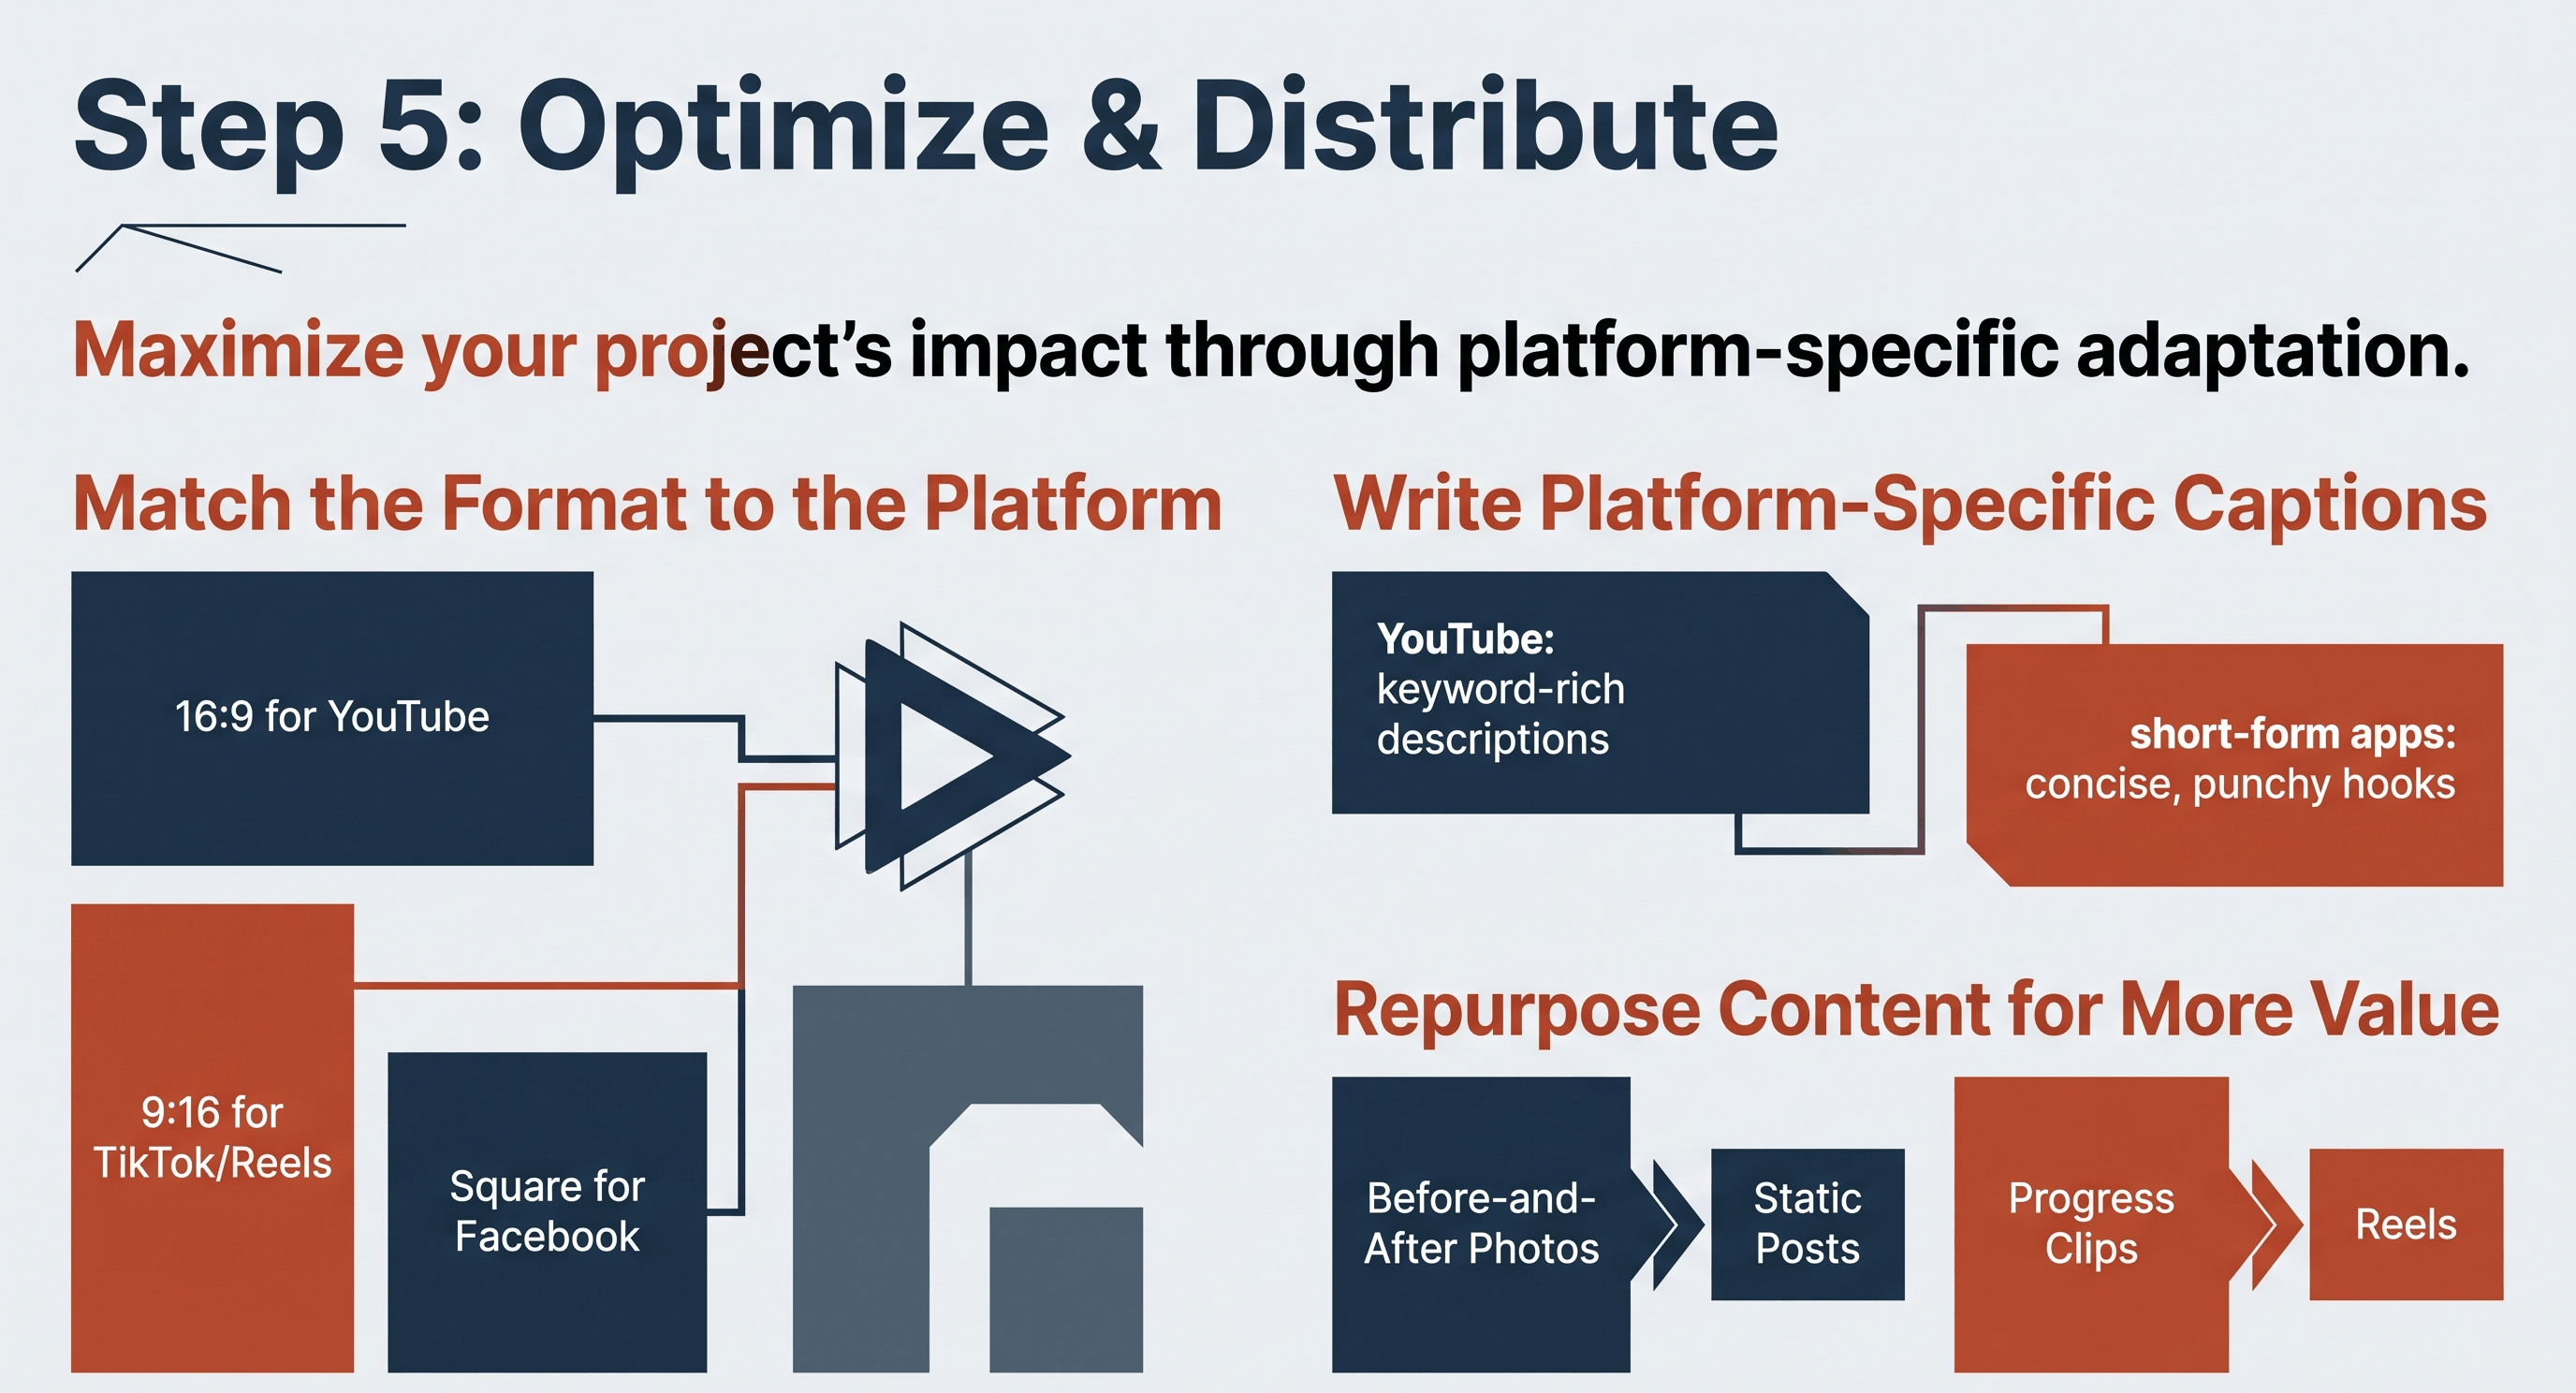
Export a horizontal 16:9 version for YouTube, a vertical 9:16 version for TikTok and Instagram Reels, and a square version for platforms such as Facebook if needed. Most modern editing software makes it easy to reframe your footage without rebuilding the entire project.
Write Platform-Specific Captions
Use descriptive titles and detailed keyword-rich descriptions for YouTube to help people discover your content through search. For short-form platforms, keep captions concise and focus on highlighting the most interesting part of the transformation. Relevant hashtags can improve discoverability, but they should support your content rather than replace clear descriptions.
Repurpose Your Content
One renovation project can generate far more than a single video. Turn before-and-after photos into social media posts, create short progress clips with Vizard AI, Reclips AI, OpusClip, Klap AI etc. for Reels or TikTok, and compile finished project highlights for your portfolio or website. Repurposing your content allows you to get more value from every project without having to film additional footage.
Why Video Has Become Essential for DIY Creators
Home improvement content continues to thrive across YouTube, TikTok, Instagram Reels, and Facebook. Audiences don't just want to see the finished result; they want to experience the transformation. Watching outdated spaces become modern, functional rooms helps viewers understand the process, learn new techniques, and gain confidence to tackle their own projects.
Video also gives creators opportunities that photos alone often cannot. You can demonstrate how materials are installed, explain why you chose a particular approach, highlight challenges you encountered, and show how you solved them. These moments make your content more educational while helping viewers connect with your work on a deeper level.
For creators who earn through sponsorships, affiliate partnerships, client referrals, or advertising revenue, video has become one of the most effective ways to build trust and establish expertise. Even if you're simply documenting personal projects, consistent, well-produced videos can help grow an audience much faster than static images.
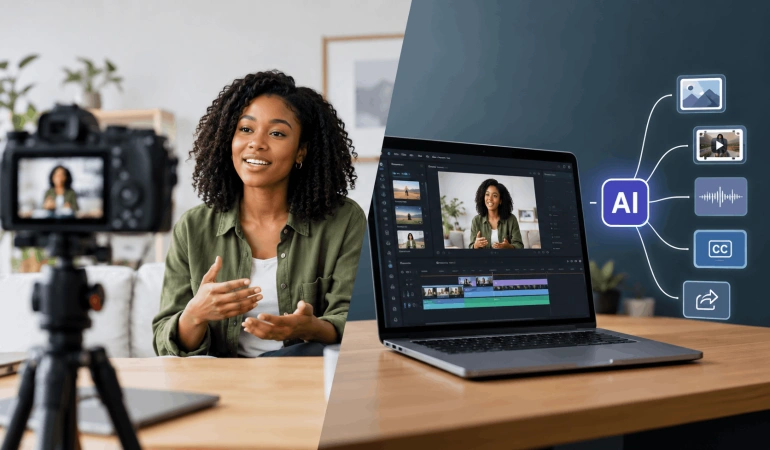
Fortunately, advances in AI video editing software have lowered the barrier to creating professional-looking content. Instead of spending hours on repetitive editing tasks, creators can use AI to speed up processes such as trimming clips, generating captions, producing voiceovers, creating background music, or extending short video segments. These tools don't replace good storytelling; they simply make it easier to produce polished videos with less manual work.
Practical Tips for Better DIY Videos
Small improvements during filming can make a noticeable difference in the final result. Even experienced creators develop simple habits that save time during editing and produce more engaging videos.
Record a few extra seconds before and after every shot. This gives you cleaner transitions and more flexibility when trimming clips.
Capture every major milestone, even if you aren't sure you'll use it. It's better to have extra footage than to discover an important moment is missing during editing.
Keep your camera angle consistent when filming before-and-after comparisons. Matching perspectives makes the transformation far more dramatic.
If you're working alone, start recording before picking up your tools instead of trying to press record in the middle of the task. You'll capture more natural footage and avoid interrupting your workflow.
These small habits require very little extra effort but often make the difference between a video that feels rushed and one that tells a complete, satisfying story.
Common Mistakes to Avoid
Even well-executed renovation projects can result in disappointing videos if a few basic filming principles are overlooked.
One common mistake is forgetting to capture the room before any work begins. Without a clear starting point, viewers don't fully appreciate the transformation.
Another is relying on long, uninterrupted recordings instead of shorter, intentional clips. Breaking projects into manageable sequences keeps the final video more engaging and easier to edit.
Poor lighting, shaky handheld footage, and inconsistent camera angles can also reduce the impact of an otherwise impressive renovation.
Whenever possible, use a tripod, take advantage of natural light, and keep before-and-after shots framed from similar positions.
Finally, don't rush the finished reveal. Give viewers a chance to enjoy the completed space from multiple angles before ending the video. The final transformation is often the most rewarding part of the entire project.
Conclusion
Creating compelling home improvement videos doesn't require a professional film crew or expensive production equipment. What matters most is documenting your project with a clear plan, capturing meaningful progress, and presenting the transformation in a way that's both informative and engaging.
By planning your shots, recording a variety of angles, editing with intention, and optimizing your videos for different platforms, you can turn everyday DIY projects into content that educates, inspires, and builds an audience over time.
AI-powered editing tools can also help simplify repetitive tasks and speed up post-production, but they work best as a complement to good storytelling rather than a replacement for it. When viewers can clearly follow your process and appreciate the finished result, your videos become far more memorable than a collection of before-and-after photos.
Frequently Asked Questions
Let’s answer some questions users have related to home improvement video creation.
Can I create home improvement videos using only a smartphone?
Yes. Most modern smartphones can record high-quality video that's more than suitable for YouTube, TikTok, Instagram, and Facebook. Good lighting, steady camera movement, and thoughtful shot planning usually have a greater impact than expensive equipment.
Should I film in 1080p or 4K?
If your phone supports it and storage isn't a concern, recording in 4K provides more flexibility when cropping or zooming during editing. Otherwise, 1080p is perfectly adequate for most home improvement videos.
How long should a DIY renovation video be?
It depends on the platform. YouTube viewers generally expect more detailed walkthroughs, while TikTok and Instagram Reels perform better with shorter videos that focus on the most interesting parts of the transformation.
Do I need AI to edit renovation videos?
No. Traditional editing software can produce excellent results. However, AI-powered editing features can help speed up repetitive tasks such as generating captions, creating voiceovers, or organizing footage, allowing you to spend more time focusing on the creative aspects of your project.

Lahaga Aondowase
I'm passionate about empowering creators through the power of AI. As the founder of AI Video Tools Pro, I aim to banish the time-wasting struggle of finding the perfect AI video tools for your content creation.
Related Articles
View All



User Comments (0)