
How to Prepare an Image-to-Video Reference for Better Camera Moves
Preparing a reference image is an important step in image-to-video creation. Before animating a still image, check its lighting, shadows, and composition to make sure they fit your planned camera movement. This guide explains how to prepare your reference image, correct distracting lighting issues, and write a camera prompt that works with the image.
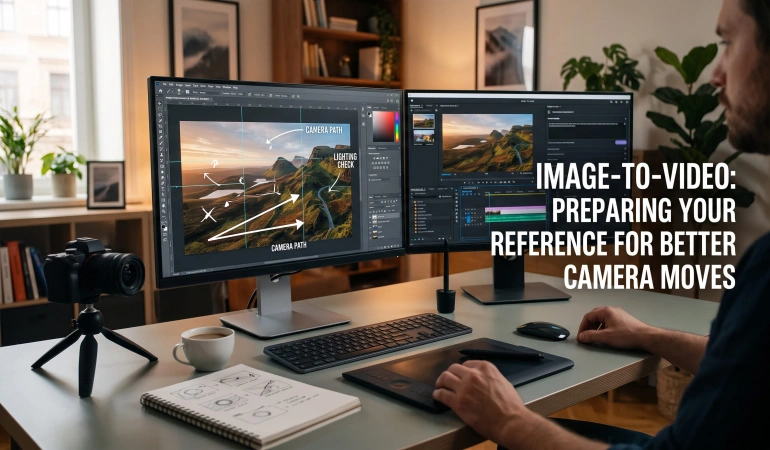
A Step-by-Step Workflow for Preparing Images for AI Video
Preparing a reference image for AI video involves more than correcting its appearance. You need to assess the lighting, choose a suitable camera movement, refine the image when necessary, and evaluate the generated clip. The following steps provide a practical workflow for preparing reference images and achieving clearer creative direction before animation.
1. Inspect the Reference Image Before Animation
Start by examining the image you intend to animate. Resist the temptation to improve everything at once. Instead, look for visual problems that could distract from the intended camera movement.
Focus on three things:
Light direction: Which side of the subject appears illuminated? Is there a plausible window, lamp, or other source?
Shadows: Do the cast shadows support the lighting direction suggested by the scene?
Subject visibility: Will the important details remain visible or readable when the camera moves closer or shifts sideways?
Imagine a product sitting on a desk beside a window. The product's left edge is brightly illuminated, but its shadow extends toward the window. That may create a visual contradiction, depending on the scene's geometry and other light sources.
You do not need to recreate a professional lighting diagram. Draw a few arrows on a copy of the image to indicate the apparent light direction and shadow direction. This simple exercise helps you identify what needs attention before opening an image editor.
Also distinguish between an actual problem and an intentional creative choice. Strong shadows can add depth and atmosphere. The goal is not to make every image evenly lit; it is to make the lighting support the shot you want to create.
2. Decide What the Camera Move Needs to Reveal
A reference image should support the intended movement, not just look attractive as a still.
Write down the camera move in one sentence. For example:
“The camera slowly pushes toward the product while the window light remains soft and directional”
Next, identify the part of the scene that will become more prominent. A push-in may reveal texture on a product, while a sideways move may expose the relationship between a foreground object and something behind it.
This matters because different movements place attention on different visual details.
Consider a desk with a cup, a notebook, and a lamp. A static shot may hide the lamp's base behind the notebook. A sideways camera move could reveal more of the lamp and the surface it illuminates. If their spatial relationship is unclear in the reference, the resulting animation may introduce unexpected geometry or visual inconsistencies.
Before generating the video, ask yourself:
Does the reference communicate the scene clearly enough for this movement?
Is there an obvious lighting contradiction that could distract from the shot?
Would a simpler camera move work better with the available image?
If the reference does not support an elaborate orbit, a modest push-in or static shot may be the more practical choice. Not every image needs a complex camera move.
If you are comparing AI video generators for a particular shot, review their available camera controls and image-to-video capabilities before choosing a workflow.
3. Correct Lighting Problems Without Losing the Original Scene
When the lighting is distracting, an AI photo editor can help you prepare an alternative reference.
For example, an underexposed product image may hide important surface details. A portrait may have uneven illumination that makes the subject difficult to distinguish from the background. Correcting these issues can help you evaluate the composition more clearly before animation.
The important step is reviewing the output rather than assuming that a brighter image is automatically better.
Check whether the edit:
Makes the main subject easier to see.
Preserves important object edges and recognizable details.
Maintains a believable relationship between highlights and shadows.
Retains the mood and contrast required by the scene.
For instance, brightening a dark background may separate a product from its surroundings. However, it could also weaken the directional lighting that makes the product look three-dimensional.
Choose the version that best supports the intended shot, not simply the one with the strongest visual transformation.
4. Compare the Original and Relit Versions
Once you have a candidate, place it beside the original and compare the same areas in both images.
Avoid judging the result only by how polished it looks. A useful reference should preserve the details that matter to the planned animation.
For a product shot, inspect the object's outline, material, reflections, and contact shadow.
For a portrait, examine facial features, the transition between light and shadow, and separation from the background.
Keep the comparison fair. If the edited version has a different crop or subject size, you may mistake a compositional change for a lighting improvement.
Use these questions to guide your review:
Is the intended light source easier to understand?
Does the main subject remain recognizable?
Have any important details changed unexpectedly?
Does the image still support the planned camera movement?
If you generate several candidates, save them with clear filenames. For example, product-original.png, product-relight-01.png, and product-approved.png are easier to differentiate than a folder of files named after their generation times.
Keep the original alongside the selected version. This gives you a reference for checking whether the edit introduced changes you did not intend.
5. Write a Camera Prompt That Complements the Image
After selecting the image reference, write a short prompt that describes what should happen next.
A common mistake in image-to-video generation is to describe every visible detail again, even though those details are already present in the uploaded image. For workflows that use the image as the starting frame, the prompt can often focus on the subject's action, camera movement, and any environmental motion.
For example, suppose your approved reference shows a ceramic cup beside a window.
A focused prompt could be:
“The camera slowly pushes toward the ceramic cup. Soft daylight remains consistent, and subtle reflections move naturally across the glazed surface”
This describes the intended movement without asking the model to invent an entirely new scene.
You can make the prompt more specific when the shot requires it. If the camera moves sideways, explain the direction. If steam rises from the cup, describe that motion. If the lighting mood is essential, state the relationship you want to preserve.
However, avoid assuming that a prompt can enforce perfect lighting consistency. Video models may still change reflections, shadows, object geometry, or illumination as the scene develops.
The reference and prompt should work together: the image establishes the visual starting point, and the prompt communicates the intended movement.
For more complex shots, understanding image-to-video prompting can help you communicate camera direction and subject movement more clearly.
6. Test the Animation Before Approving the Shot
A well-prepared reference is only the first step. The generated video needs its own review.
Start with a short test when your chosen tool supports it. Watch for problems that were not obvious in the still image.
Pay particular attention to:
Lighting changes: Do the highlights or shadows shift in ways that distract from the shot?
Object consistency: Does the product retain its shape and recognizable details?
Camera movement: Does the motion reveal the intended part of the scene?
Unexpected changes: Do reflections, background objects, or subject details distort during the animation?
Return to the original and approved references if something looks wrong. This helps you determine whether the problem came from the source image, the camera instruction, or the generation itself.
You may need to revise the prompt, choose a different reference, or simplify the movement. Some problems may persist even after those changes, so avoid spending too much time trying to correct an issue that the selected model cannot reliably handle.
When an issue remains in the generated clip, AI video editing tools may provide additional options for refining the result, depending on the problem and the controls available.
Most importantly, evaluate the still image and the generated clip separately. A reference can be visually convincing while the animation fails to preserve its details. Likewise, a modest reference image may produce a perfectly usable shot with a simple camera move.
7. Prepare a Clear Handoff for Your Next Video Generation
Before starting the final generation, organize the essential decisions into a small production note.
Include:
Approved reference: The exact image selected for animation.
Camera movement: A single, clear description of the intended move.
Lighting intention: The direction or quality of light that matters to the shot.
Protected details: Important features, such as a product's outline or a recognizable facial feature.
Review criteria: The specific problems you will check in the generated clip.
For a product reveal, that note might read:
Reference: approved product image. Camera: slow push-in. Lighting: soft daylight from the left. Preserve: product shape, label, and contact shadow. Review: check for distracting reflection changes and product distortion.
This is more useful than a vague instruction to make the video look cinematic. It gives you clear criteria for deciding whether the result works.
If you are collaborating with an editor or another creator, share the approved image rather than a folder of unlabelled alternatives. Include the original when the difference between the two images matters to the decision.
Final Thoughts
Preparing an image before animation does not need to become a complicated production process. Inspect the lighting, identify what the camera movement needs to reveal, and make targeted edits only when they improve the reference.
An AI photo editor can help you explore a better-lit version of a still, but the final decision should depend on the image itself and the shot you intend to create. Sometimes a relit candidate will be more useful; sometimes the original will preserve the scene's character more effectively.
Once the reference is approved, write a clear motion prompt and evaluate the generated video independently. The objective is not to eliminate every visual imperfection. It is to give your AI video workflow a clear starting point and a specific creative direction.
Frequently Asked Questions
These answers address common challenges creators face when turning still images into AI-generated videos.
1. Should You Edit an Image Before Using It in an AI Video Generator?
Not always. If the original image has clear lighting, a recognizable subject, and a composition that supports your intended camera movement, you may not need to edit it.
Consider making adjustments when distracting shadows, poor visibility, or inconsistent lighting could affect the shot. Unnecessary edits can introduce new artifacts or change details you want to preserve.
2. Does Relighting a Reference Image Improve AI Video Quality?
Relighting can improve the reference image's appearance and make its intended lighting easier to understand. However, it does not guarantee better animation.
AI video generators can still introduce changes to shadows, reflections, object shapes, and illumination as the scene moves. Review the edited still first, then evaluate the generated video separately.
3. What Is the Best Camera Movement for Image-to-Video Generation?
The best movement depends on the subject, composition, and amount of visual information in the reference. A slow push-in works well for drawing attention to a product or facial detail, while a gentle sideways move can reveal more of a scene.
4. How Do You Write a Good Image-to-Video Camera Movement Prompt?
Describe the camera movement, the subject's intended action, and any important visual characteristics you want to preserve.
For example: “The camera slowly pushes toward the product as soft daylight falls from the left, with subtle reflections moving across its surface.”
Keep the instruction focused rather than describing every detail already visible in the reference. Results will vary by video model.
5. Can AI Video Generators Maintain Consistent Lighting During Camera Movement?
They can sometimes maintain a convincing lighting arrangement, but perfect consistency is not guaranteed. Shadows, highlights, reflections, and background illumination may change as the camera moves.
A clear reference and focused prompt can help communicate your intention, but you should inspect the generated clip for unwanted visual changes before approving it.
6. Why Does an AI-Generated Video Look Different From Its Reference Image?
An image-to-video model generates new frames rather than simply moving the original image without alteration. During generation, it may reinterpret object geometry, facial features, textures, lighting, or background details.
A clear reference, a focused motion prompt, and a less demanding camera move may reduce some inconsistencies, but they cannot eliminate every model limitation.
7. Should You Use a High-Resolution Image for AI Video Generation?
Use an image with enough detail to represent the subject clearly, but follow the resolution and aspect-ratio requirements of your chosen video generator.
Higher resolution alone does not guarantee a better result. Composition, subject clarity, lighting, and compatibility with the generation tool can be just as important. Avoid unnecessary resizing or cropping that removes details needed for the planned shot.
8. How Can You Prevent Objects From Changing During Image-to-Video Animation?
Start with a reference in which the important objects are clearly visible, and identify the details that must remain recognizable, such as a product label, outline, or facial feature.
Keep the camera movement appropriate to the reference and avoid prompts that introduce unnecessary actions or scene changes. Review the output for distortions, since even careful preparation cannot guarantee perfect object consistency.
9. Should You Fix Lighting Problems in the Image or in the Video Editor?
Whenever possible, address obvious problems in the reference before generating the video. This gives you a clearer starting point and lets you evaluate the intended lighting before motion introduces additional variables.
Post-production editing may help correct issues that appear during animation, but some changes are easier to address at the reference stage. The right approach depends on the problem and the editing controls available in your workflow.

Lahaga Aondowase
Is the founder of AI Video Tools Pro, an AI video tools directory that helps creators, marketers, educators, and businesses discover AI video software. He researches and evaluates AI video tools based on their features, use cases, pricing, and practical workflows.
Related Articles
View All


User Comments (0)